SSM 整合教程,献给新人们的礼物 - 第二章

前情回顾

 在第一章里,我们完成了一个基于 Spring + Spring MVC 的 Web 应用程序。但在我们现实中,一个具有一定业务能力的 Web 系统往往都需要进行数据的持久化。接下来,我们会在第一章的基础上,整合 ORM 框架 — Mybatis

ORM: Object Relational Mapping 对象关系映射

添加 Mybatis 依赖

1
2
3
4
5
6
7
8
9
10
11
12
13
14
15
16
17
18
19
20
21
22
23
24
25
26
27
28
29
30
31
32
33
34
35
36
37
38
39
40
41
42
43
44
45
46
47
<!-- Mybatis -->
<dependency>
<groupId>org.mybatis</groupId>
<artifactId>mybatis</artifactId>
<version>3.4.4</version>
</dependency>
<dependency>
<groupId>org.mybatis</groupId>
<artifactId>mybatis-spring</artifactId>
<version>1.3.1</version>
</dependency>
<!-- 数据库连接池 -->
<dependency>
<groupId>com.mchange</groupId>
<artifactId>c3p0</artifactId>
<version>0.9.5.2</version>
</dependency>
<!-- Spring ORM -->
<dependency>
<groupId>org.springframework</groupId>
<artifactId>spring-orm</artifactId>
<version>4.3.7.RELEASE</version>
</dependency>
<!-- Spring 事务 -->
<dependency>
<groupId>org.springframework</groupId>
<artifactId>spring-tx</artifactId>
<version>4.3.7.RELEASE</version>
</dependency>
<!-- Spring AOP -->
<dependency>
<groupId>org.aspectj</groupId>
<artifactId>aspectjweaver</artifactId>
<version>1.8.10</version>
</dependency>
<!-- Mysql 驱动 -->
<dependency>
<groupId>mysql</groupId>
<artifactId>mysql-connector-java</artifactId>
<version>6.0.6</version>
</dependency>

创建数据库配置文件

在资源文件夹 resoueces 下创建 datasource.properties:

1
2
3
4
5
6
7
8
9
10
11
12
13
14
15
16
# c3p0 property
# 数据库驱动
jdbc.driverClassName=com.mysql.jdbc.Driver
# 数据库链接
jdbc.url=jdbc:mysql://localhost:3306/easyms?useUnicode=true&characterEncoding=UTF-8&serverTimezone=UTC
# 用户名
jdbc.username=root
# 密码
jdbc.password=000000
# 最大连接数
conn.maxPoolSize=40
conn.maxStatements=80
# 最小连接数
conn.minPoolSize=5
conn.initialPoolSize=5
conn.maxIdleTime=60

配置数据源

在 spring 配置文件 ssm-context.xml 里配置数据源,首先需要导入数据库配置文件 datasource.properties

1
2
<!--解析资源文件 -->
<context:property-placeholder location="classpath:database.properties"/>

配置数据源,在 ssm-context.xml 添加如下内容:

1
2
3
4
5
6
7
8
9
10
11
12
<bean id="dataSource" class="com.mchange.v2.c3p0.ComboPooledDataSource"
destroy-method="close">
<property name="driverClass" value="${jdbc.driverClassName}" />
<property name="jdbcUrl" value="${jdbc.url}" />
<property name="user" value="${jdbc.username}" />
<property name="password" value="${jdbc.password}" />
<property name="maxIdleTime" value="${conn.maxIdleTime}" />
<property name="maxStatements" value="${conn.maxStatements}" />
<property name="initialPoolSize" value="${conn.initialPoolSize}" />
<property name="maxPoolSize" value="${conn.maxPoolSize}" />
<property name="minPoolSize" value="${conn.minPoolSize}" />
</bean>

注意:dataSouce 的创建必须在 解析资源文件之后,因为初始化数据源的各种信息是通过资源文件读取出来的。

配置 SqlSessionFactory

ssm-context.xml 添加如下内容:

1
2
3
4
5
6
7
8
9
10
11
12
13
<!-- MyBatis sqlSessionFactory配置 -->
<bean id="sqlSessionFactory" class="org.mybatis.spring.SqlSessionFactoryBean">
<property name="dataSource" ref="dataSource" />
<property name="mapperLocations" value="classpath:mybatis/mapper/*.xml" />
<property name="typeAliasesPackage" value="ml.jjandxa.mapper.model" />
</bean>
<!-- 自动扫描 Mapper -->
<bean id="mapperScannerConfigurer" class="org.mybatis.spring.mapper.MapperScannerConfigurer" >
<property name="basePackage" value="ml.jjandxa.mapper.mapper" />
</bean>
<bean id="sqlSessionTemplate" class="org.mybatis.spring.SqlSessionTemplate">
<constructor-arg index="0" ref="sqlSessionFactory" />
</bean>

注:mapperLocations 为 Mapper Xml 文件所在路径,这里为 resources/mybatis/mapper 文件夹为例。typeAliasesPackage 为 Model 类所在路径。

配置 AOP 事务管理

ssm-context.xml 添加如下内容:

1
2
3
4
5
6
7
8
9
10
11
12
13
14
15
16
17
18
<!-- Spring事务管理器 -->
<bean id="txManager"
class="org.springframework.jdbc.datasource.DataSourceTransactionManager">
<property name="dataSource" ref="dataSource" />
</bean>
<aop:config>
<aop:pointcut id="serviceMethmods" expression="execution(* ml.jjandxa.service.*.*(..))" />
<aop:advisor pointcut-ref="serviceMethmods" advice-ref="txAdvice" />
</aop:config>
<!-- 事务的传播特性 -->
<tx:advice id="txAdvice" transaction-manager="txManager">
<tx:attributes>
<tx:method name="insert*" propagation="REQUIRED" />
<tx:method name="delete*" propagation="REQUIRED" />
<tx:method name="update*" propagation="REQUIRED" />
<tx:method name="*" read-only="true" />
</tx:attributes>
</tx:advice>

注:pointcut 里的 expression 需更改为相应的包名,它的作用就是配置 aop 时拦截哪些类与方法

如果提示 apotx 标签找不到,需要在根节点的属性里导入标签的命名空间

1
2
3
4
5
6
7
8
9
<beans
xmlns:aop="http://www.springframework.org/schema/aop"
xmlns:tx="http://www.springframework.org/schema/tx"
xsi:schemaLocatio="http://www.springframework.org/schema/aop
http://www.springframework.org/schema/aop/spring-apo.xsd
http://www.springframework.org/schema/tx
http://www.springframework.org/schema/tx/spring-tx.xsd">
</beans>

到此为止,框架整合的部分结束,接下来便是如何使用的部分了。

编写业务代码

对 Mybatis 来说,编写业务时需要几部分:

  1. Mapper 接口
  2. Mapper XML
  3. Model

其中 Mapper 接口与 Mepper XML 是相对应的,对于每个表都需要以上三部分。回头看看 Mybatis 的配置中,sqlSessionFactorymapperScannerConfigurer 配置了几个关键属性:

  1. sqlSessionFactorymapperLocations 属性,这个属性配置 Mapper XML 的路径。
  2. sqlSessionFactorytypeAliasesPackage 属性,这个属性配置 Model 的路径。
  3. mapperScannerConfigurerbasePackage 属性,这个属性配置了 Mapper 接口的路径。

基于以上配置,我们先在 ml.jjandxa.mapper.model 下编写 Model:

1
2
3
4
5
6
7
8
9
10
11
12
13
14
15
16
17
18
19
20
21
22
23
24
25
26
27
28
29
30
31
32
33
34
35
36
37
package ml.jjandxa.mapper.model;
/**
* Created by aixiaoai on 2017/4/23.
*/
public class User {
private Integer id;
private String name;
private String password;
public Integer getId() {
return id;
}
public void setId(Integer id) {
this.id = id;
}
public String getName() {
return name;
}
public void setName(String name) {
this.name = name;
}
public String getPassword() {
return password;
}
public void setPassword(String password) {
this.password = password;
}
}

接着我们需要在 ml.jjandxa.mapper.mapper 包下编写 Mapper 接口 :

1
2
3
4
5
6
7
8
9
10
11
12
13
14
15
16
package ml.jjandxa.mapper.mapper;
import ml.jjandxa.mapper.model.User;
import org.springframework.stereotype.Repository;
import java.util.List;
/**
* Created by aixiaoai on 2017/4/23.
*/
@Repository
public interface UserMapper {
// 查询所有用户
List<User> selectAll();
}

最后,便是需要在 resources/mybatis/mapper 下编写 Mapper XML 文件:

1
2
3
4
5
6
7
8
9
10
11
12
13
14
15
<?xml version="1.0" encoding="UTF-8" ?>
<!DOCTYPE mapper PUBLIC "-//mybatis.org//DTD Mapper 3.0//EN" "http://mybatis.org/dtd/mybatis-3-mapper.dtd" >
<mapper namespace="ml.jjandxa.mapper.mapper.UserMapper">
<resultMap id="BaseResultMapper" type="ml.jjandxa.mapper.model.User" >
<id column="ID" property="id" />
<result column="NAME" property="name" />
<result column="PASSWORD" property="password" />
</resultMap>
<select id="selectAll" resultMap="BaseResultMapper" >
SELECT * FROM USER
</select>
</mapper>

注:以上三步,Mapper 接口、Model 的编写都较为简单。重点在于 Mapper XML 的编写。

  1. Mapper XML 根节点的 namespace 即是 Mapper 接口的全限定包名,这就是为什么说 Mapper 接口与 Mapper XML 是相对应的。
  2. Mapper XML 中的 selectupdateinsertdelete 节点对应 Mapper 接口中的一个方法。

至此,可以发现 Mapper XML 中的 namespace 加上节点id 等于 Mapper 接口中的方法 ml.jjandxa.mapper.mapper.UserMapper.selectAll()

注2:Mapper 接口需要加上 @Repository 注解

最后我们需要编写 Service 层的代码:

1
2
3
4
5
6
7
8
9
10
11
12
13
14
15
16
17
18
19
20
21
22
23
package ml.jjandxa.service;
import ml.jjandxa.mapper.mapper.UserMapper;
import ml.jjandxa.mapper.model.User;
import org.springframework.beans.factory.annotation.Autowired;
import org.springframework.stereotype.Service;
import java.util.List;
/**
* Created by aixiaoai on 2017/4/23.
*/
@Service
public class UserService {
@Autowired
private UserMapper userMapper;
//查询所有
public List<User> selectAll() {
return userMapper.selectAll();
}
}

注:同样,注意要加上 @Service 注解

最后一部分,在 Controller 中注入 UserService,这里选择在第一章中最后测试用的 HelloSpring 来测试:

1
2
3
4
5
6
7
8
9
10
11
12
13
14
15
16
17
18
19
20
21
22
23
24
25
26
27
28
29
30
31
32
33
34
35
36
37
package ml.jjandxa.controller;
import ml.jjandxa.mapper.model.User;
import ml.jjandxa.service.UserService;
import org.springframework.beans.factory.annotation.Autowired;
import org.springframework.stereotype.Controller;
import org.springframework.web.bind.annotation.RequestMapping;
import org.springframework.web.bind.annotation.ResponseBody;
import java.util.HashMap;
import java.util.List;
import java.util.Map;
/**
* Created by aixiaoai on 2017/3/24.
*/
@Controller
public class HelloSpring {
@Autowired
private UserService userService;
@ResponseBody
@RequestMapping("/hello")
public Object hello() {
// 查询所有记录
List<User> list = userService.selectAll();
Map<String, Object> result = new HashMap<>();
result.put("data", list);
return result;
}
}

注: 记得往表里添加数据!!

来测试一下吧,启动服务。观察控制台输出,若没有异常,便说明整合并无出现明显错误。访问 http://localhost:8080/hellossm/hello
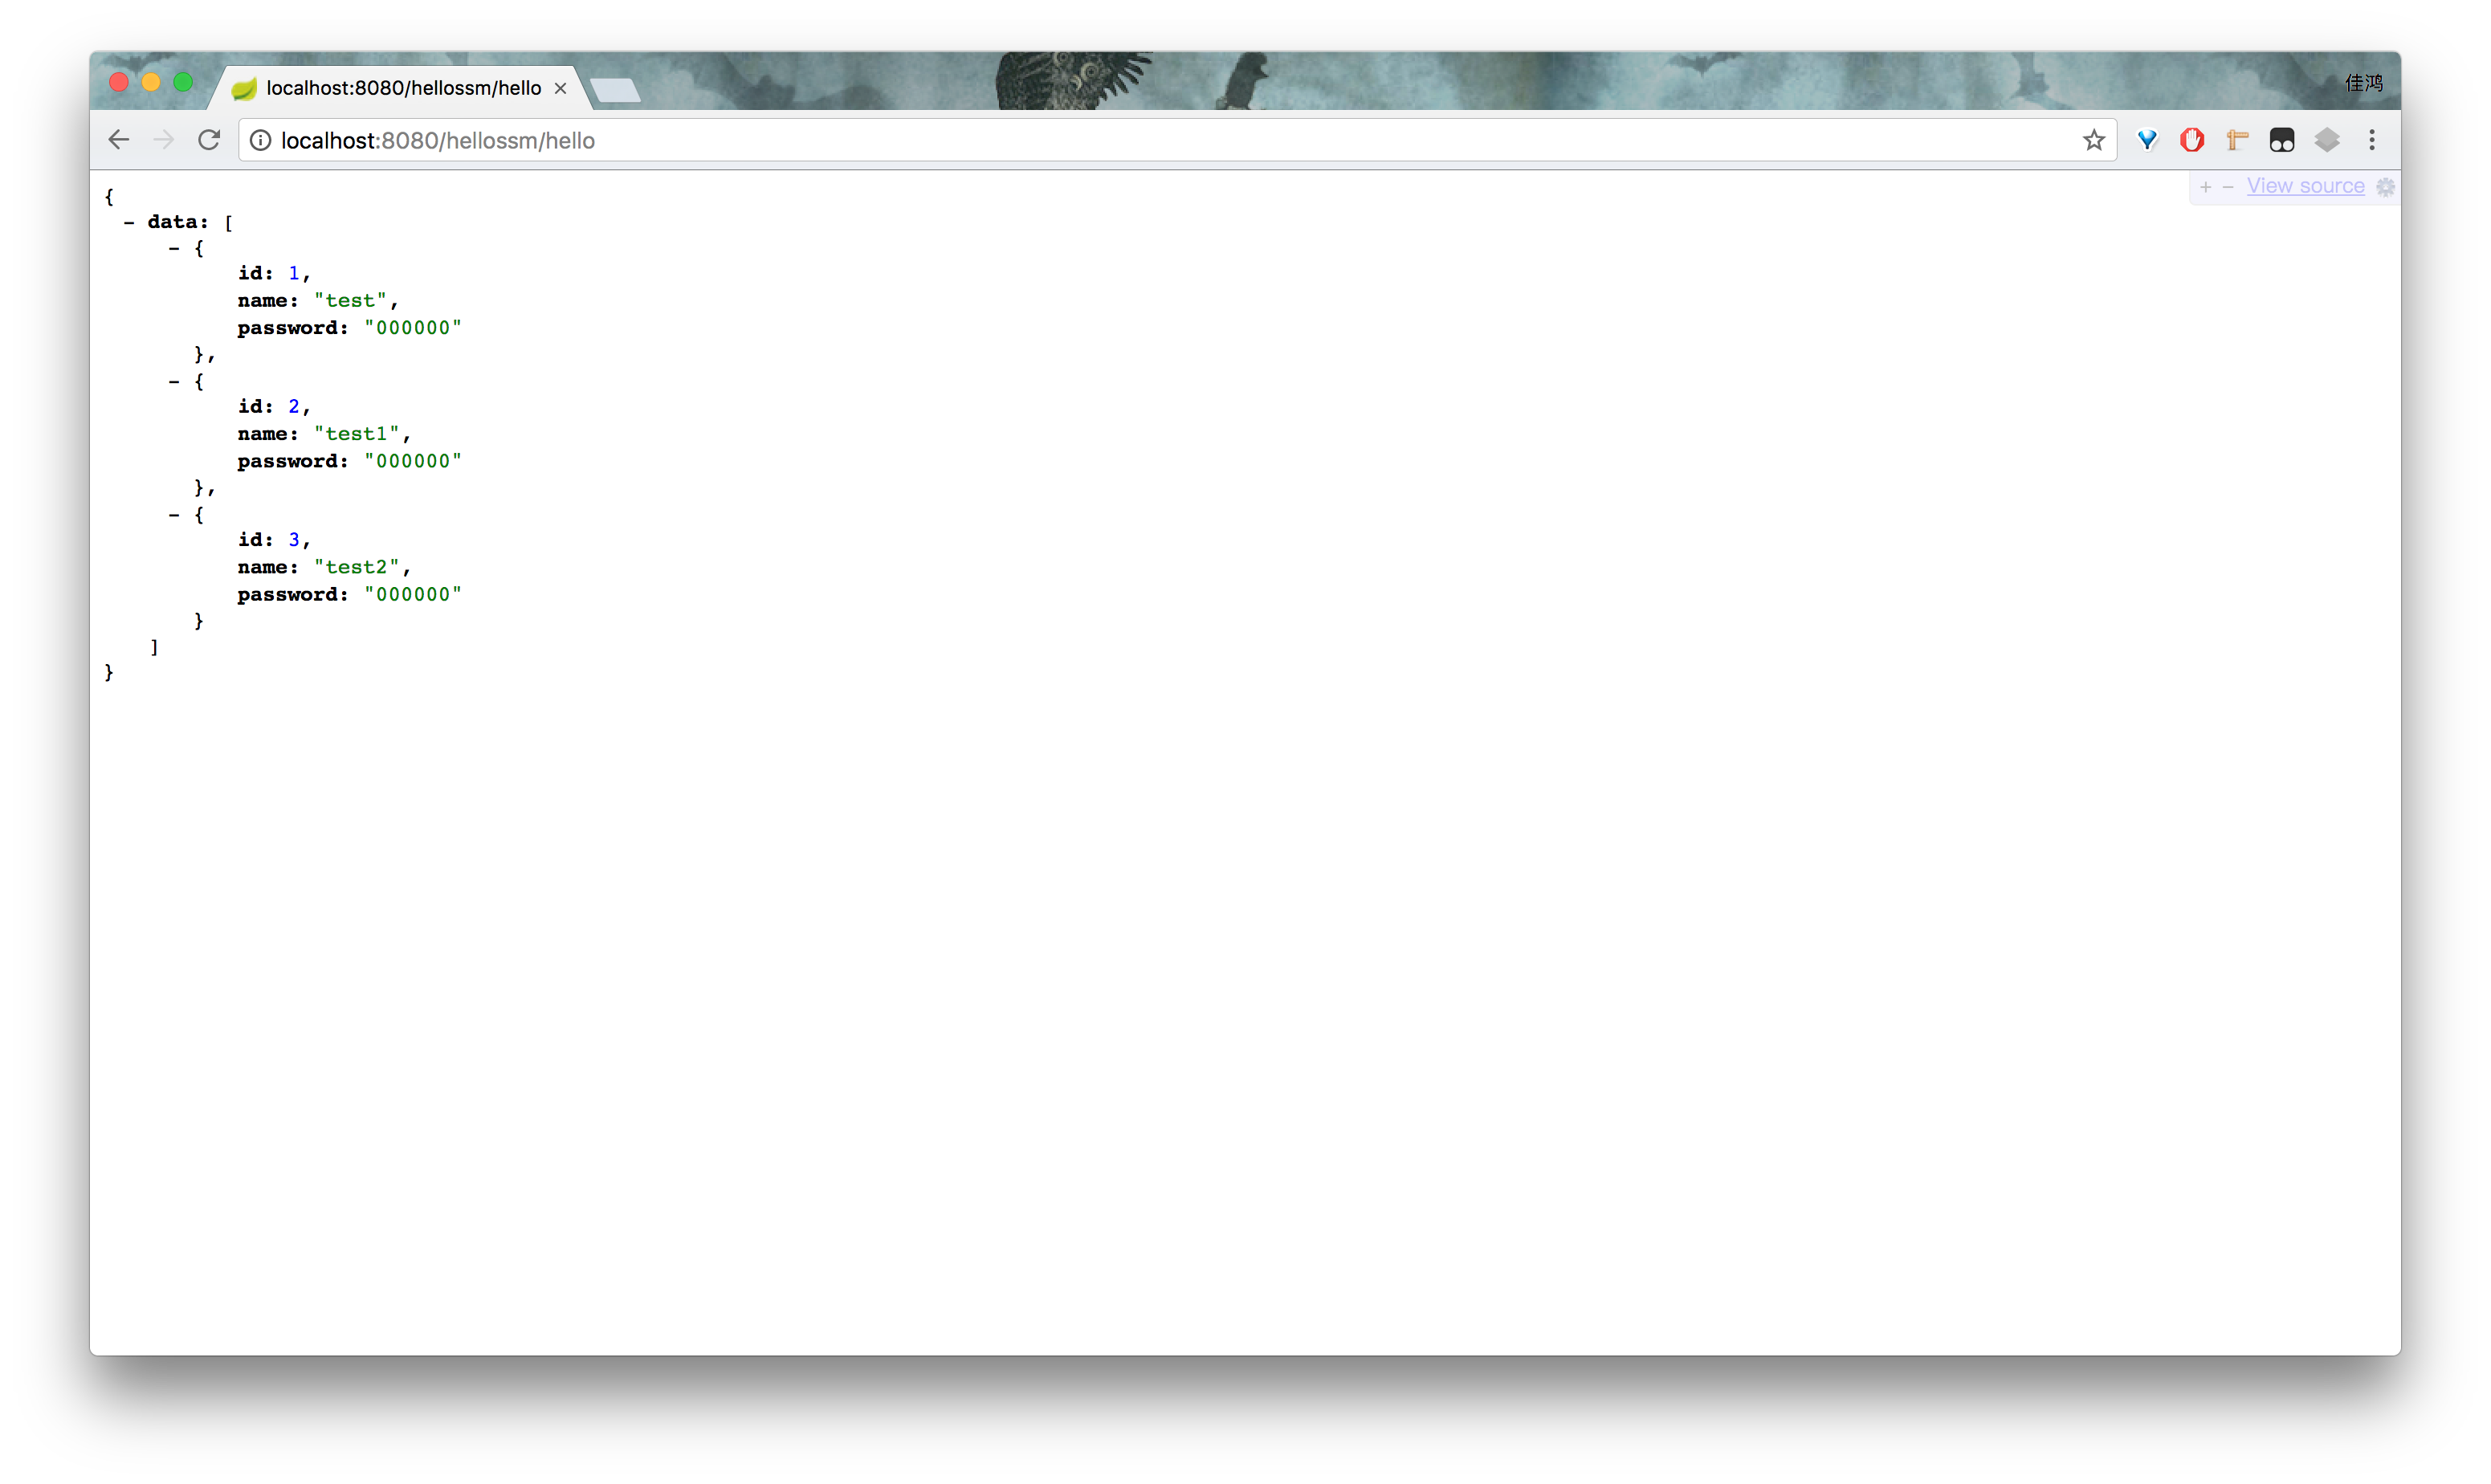
ssm-c2-test

成功查询出数据!大成功!!!

附录

源代码

结语

SSM 整合教程到这里就结束了。这些东西很简单,但我想作为新手们入门的一个敲门砖很合适。我们不仅需要知道如何整合框架,也需要明白这些框架如何使用。后续可能会出 Spring MVC 入门使用教程,Mybatis 入门使用教程。当然,最后还是会告诉大家。以上这么繁杂的配置过程,其实都可以用 Spring Boot 来快速解决。但在那之前,希望新手们能够多花时间学习、实践、总结。

^_^